Showing posts with label big roll of paper. Show all posts

Tuesday, January 21, 2014

Snow Day!


A few days ago, wishing for snow, we started cutting out paper snowflakes.

We all love paper snowflakes - they are one of the few crafts that everyone likes to do at every age. 

The oldest kids fold and cut their own, middle kids fold some and cut some extra that I have folded, and the very youngest kids draw the design they want me to cut.

We like to do tiny ones to hang from the ceiling, and big ones to tape to the windows.  This year, Klenda asked what would happen if we tried the Big Roll of Paper.

She gave it a try and got a beautiful giant snowflake!  You can make the giant ones really intricate!


 Last night we had a beautiful sunset with lacy clouds blowing in from the west.

And today we have 4 inches of snow and counting!  They say we might get 8 inches, or even 10!!


Sunday, March 10, 2013

Classic Birthday

 Leena's actual birthday was last week.  On her actual birthday, she wanted a jello cake.  Specifically, a jello cake from the grape mold that was really flavored raspberry and lime (in layers).  She's quirky like that.

The previous post's pictures were from the party with extended family. Yes, she did end up with three cakes and three parties!

For her birthday party today (with friends), she wanted a "classic" birthday.

So, we decorated with streamers and balloons.


We had a two layer white cake with pink frosting and sprinkles.

We had a big bunch of friends over.

And we played classic party games!

First we had Pin-the-Tail-on-the-Donkey. We just drew a donkey and some tails on my big roll of brown paper.

Then we played Musical Chairs.

Then we played a face drawing relay game.


We had two teams, each armed with a marker.  Each member of the team had to run across the room and draw one facial feature, then run back and hand off the marker!  It ended up looking like this:


 So fun!  Happy birthday, Leena!


Monday, January 14, 2013

Build Your Castle in 5 Easy Steps

 1. Tape paper to the walls.  We used our Big Roll of Paper, and we notched the top layer, but you can leave it straight and add copy paper to make the crenelations later.  The big thing is: just tape the paper to the wall (do to not tape the layers together at this point).

We like round arches over doorways.

2.  Make a dilute solution of black watercolor (or black food coloring) and blot it onto the paper with a wad of paper towels (or a rag).  You want just enough in the wad that it isn't quite dripping.  Don't wipe!  You want it blotchy with some paper showing. The water in the paint will give the paper a stone texture as well as color.

3. After it dries, tape the seams (paper to paper).

4. Draw in the stone.  I used a broom stick marked in sections to keep my horizontal lines even. I like to make the lower courses larger than the top ones to give an illusion of greater height. I penciled the stone in before we painted, and then the Zoomlians traced the lines with gray marker, but it could be done more simply here in one step.


5. If you have a doorway, you can put in a portcullis!  Ours is cut out of folded up layers of foil and is entirely decorative (it doesn't move).  If you figure out a way to make a functional portcullis, we'd love to hear about it!


And here you have it: a castle, ready to be adorned with all manner of knightly embellishment!

Monday, November 12, 2012

Thankfully Before and After

 Thanksgiving is NEXT WEEK?!

Time to get thankful!

So, I made a turkey with the help of Oob.  I had grabbed a roll of builders paper at Home Depot a while ago (near the paint department), and I must say, it's great for craft projects (where you want brown paper), heavy but easy to cut, and super cheap. It's about 3 feet wide and comes in a big roll.

Oob put on the eyes (cross eyed) and gave the turkey buttons.  He also put googly eyes on the wings and a few other random adornments.  He glued a piece of Halloween candy in the turkey's mouth, for example.
 
Still, this was everyone's turkey, not just Oob's, so I felt the need to scale back the surrealism.

We cut out feathers, and let everyone write things they were thankful for on them.  This was last week, and he is still acquiring feathers now and then.

Voila!  A thankful turkey!


Sunday, May 27, 2012

Come Holy Spirit

I wanted to do something special for Pentecost, especially since Mxyl and Klenda are fairly recently confirmed. 

On the other hand, as you might expect, I didn't feel up to designing and carrying out a major project.

What I wanted was something that would show the gifts and the fruits of the Holy Spirit in a fun way, but also big and obvious enough that I would remember to talk about them.

I printed a list and I cut out a dove.

The kids made construction paper gifts and fruits.  They are all taped at the top so you can lift them up to read which gift or fruit it is!

Fun and easy peasy lemon squeezy! 

I think the lemon is joy.

Wednesday, May 21, 2008

Crazy Bug Hats


I had forgotten about these! We used to do them all the time when the three oldest Zoomlians were little and they had forgotten all about them!

Here's how to make your own: I used my Big Roll of Paper, but you can use any paper big enough to make newspaper hats.

1. Take a largish sheet of paper and center it over a kid's head.
2. Tape it around their head with a band of packing tape. At this point it looks like the kid is wearing a paper ghost costume without eyes.
3. Take it off the kid and roll up the paper edges to make a brim. Roll it just a little and it looks like a sombrero (depending on if you started with a square or rectangle). To make a smaller brim roll and crumple more!

You could stop here for a plain strange hat or you could decorate the hat with feathers, bells, foil, scarves, or whatever you have on hand to make hats for tea parties, cowboy round ups, space excursions, etc.

4. Decorate to make a crazy bug (or whatever you like). We tuck pipe cleaner antennae into the tape band and put on large crazed eyes. Strange proboscises are optional. Pipe cleaner or folded paper legs are also good. I bet you could even make it educational (look, your crazy bug hat has 6 legs, just like a real bug)!

Easy peasy lemon squeezy! This would be a good Fun Jar activity.

Monday, February 25, 2008

Our Home IS Our Castle!


When we hit the Middle Ages in Child's History of the World, I asked the kids how much they remembered from the unit study we had done 2 years ago. They actually remembered quite a bit, but they wanted to do it again. Sure, why not!

I made a KWL chart listing what we Know, what we Want to know and a space for what we Learned. I've since seen fancier charts that include a column for How we can find out what we are interested in. KWHL! I'll try that next time.

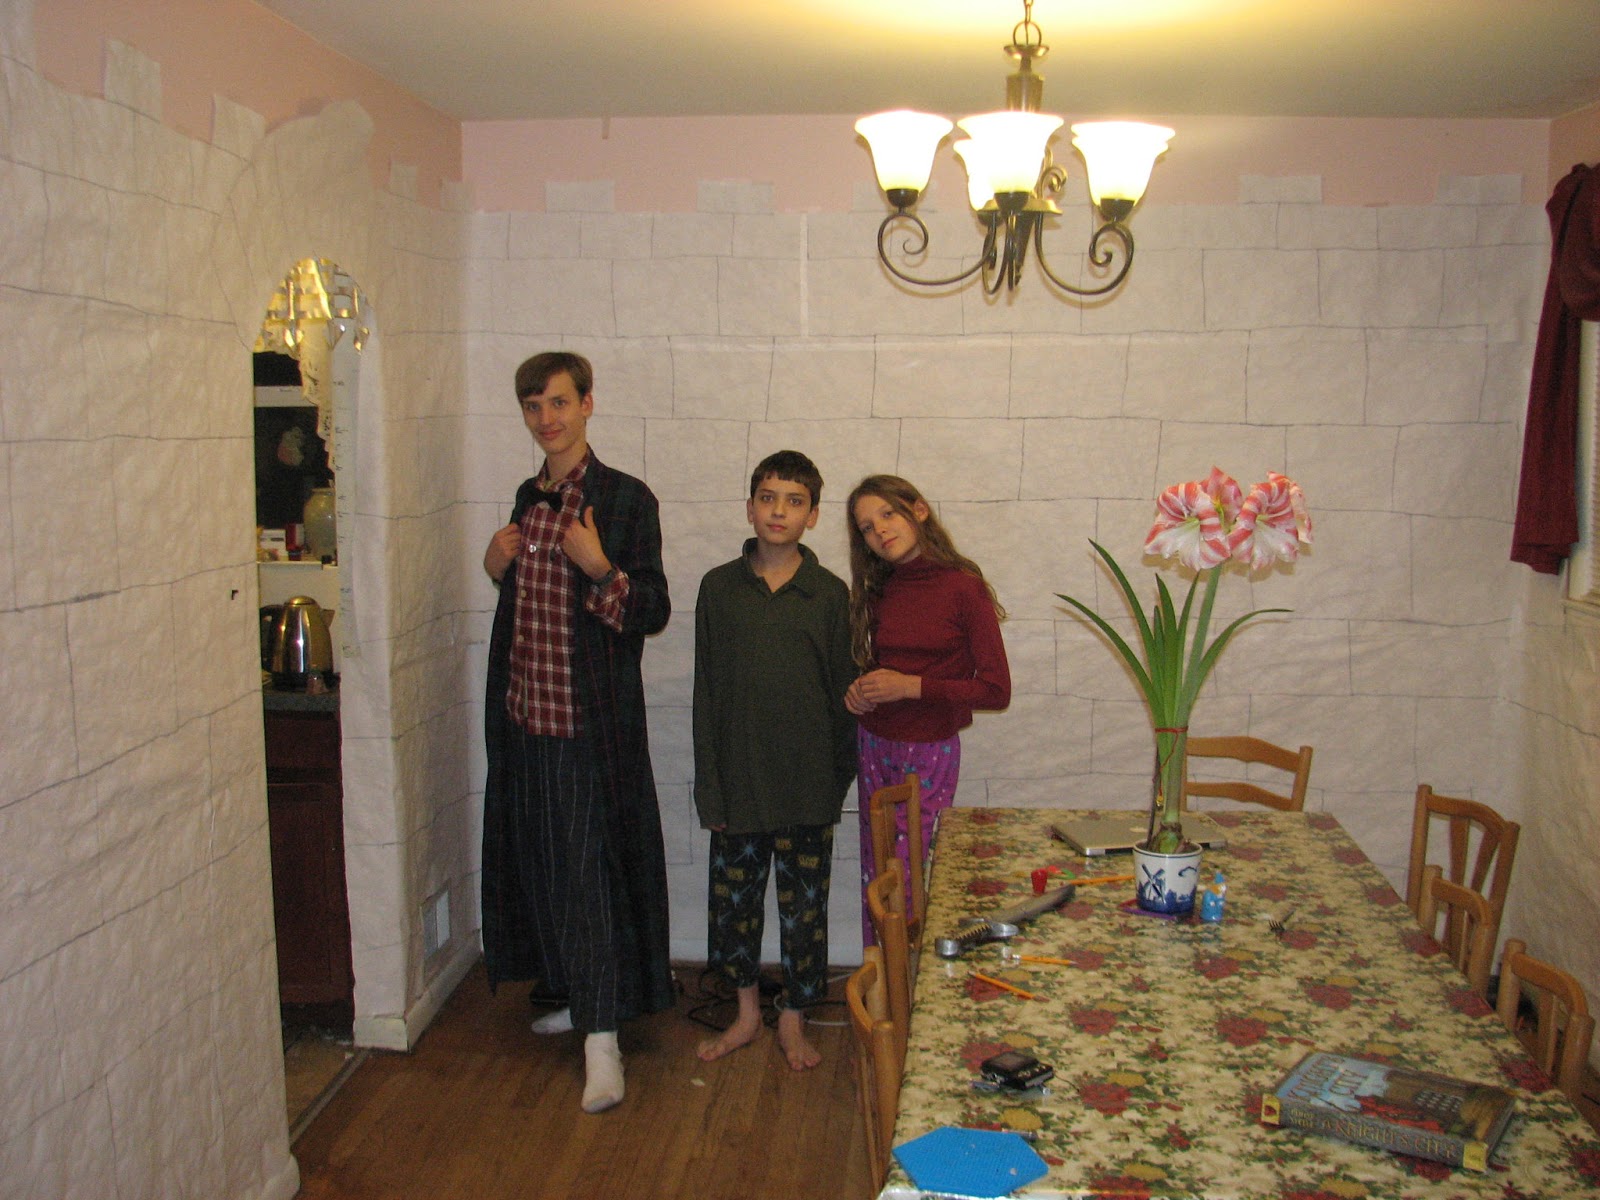
So far we've made a castle from our Big Roll of Paper. We learned how to rag, that is, paint with rags (paper towels!) and very dilute liquid watercolor. I knew this would give a mottled stone effect, but I was delighted to find that the water in the paint also puckered the paper into a great stone texture. We made the portcullis out of several thicknesses of foil. We discussed building techniques from then and now, especially the importance of staggering the courses of stone.

We talked about heraldry and designed coats of arms. We made windows. My personal favorite is Zorg's window. It's the black and white one which shows a hail of arrows storming the castle and several small snails on the window sill. The snails make it so that it's not too scary.

We did some weaving on a tapestry and we will do some embroidery on it later.

I almost forgot! The thing in the middle is the head of some hideous beast (slain by the noble knights, no doubt!) You may have to click on the picture to see it (if you have strong nerves).

We did some castle websites like Ghosts in the Castle and Kids Castle.

Today I traced the kids and they designed their own armor. We talked some about the parts of armor and what they are for, but not as much as I wanted to. I had wanted to go through it all before they started, but I didn't have my act together.

Mxyl and Klenda picked out topics for research reports on the Middle Ages and started reading and taking notes. Klenda wants to know about food and Mxyl is thinking about knights, particularly the relationship of the knight to the king. They will write their reports, create a visual aid and present them for us and some guests at a Medieval Feast in a week, or two, or three! Depends how into it they are.

I am hoping to do paper making and calligraphy later this week, and maybe experiment with some of the medieval technology: sundials, catapults, maybe dying cloth. I don't have it all figured out, but a lot will depend on the length and depth of interest. I found a free printable 3 D castle here.

I'd kind of like to do something with stained glass, but I'm not sure what the patience level will be for cutting and gluing tissue paper and construction paper. I may "cheese" and do crayon shavings! Or worse, oiled paper!

This whole project touches on my core educational philosophy about doing things that are interesting and/or useful. I want the kids to be able to find information on the things they want to know about. They need to be able to explain what they know. I want them to experience history and science as vividly as possible. I want them to understand that the people who were then and the people who are now are equally real. I want them to be able to see from other perspectives.

Best of all, I love to hear, "Daddy's home! Raise the portcullis!!!"

Sunday, January 27, 2008

Finishing Beowulf


The only proper way to finish up with Beowulf was to stage at least part of the epic. Here you see King Hrothgar (Zorg) holding aloft the bloody arm of Grendel. Mxyl portrayed Beowulf. I was Grendel. Leena was the edible Thane (the only child willing to be seized and eaten). Klenda was the inedible comrade who stayed far on the other side of the mead hall. The Emperor declared it a thrilling performance!

Tuesday, January 8, 2008

Beowulf

I find I almost always end up with a high tide unit study in January. I think it has to do with taking down the Christmas stuff and seeing all that blank wall space again.

We are having a fabulous time with Beowulf, reading and coloring. I would like to extend the moment, and do a unit study. Poking around, most things seem to be geared for high school.

I'm not doing the Old English version, though I'd like to show the kids what it looks and sounds like. I think we will act it out (with me or the Emperor as Grendel with a detachable arm made from my big roll of paper). I'd like to explain about thanes and gifts and the warrior culture. And make food (danish?). Any ideas?

Wednesday, August 15, 2007

Dino Times

I have to find the pictures of this, but the last time we went on a dinosaur binge we cut out a life size T Rex (just the upper part) and put him coming out over the couch. I figured out later that we could have done the whole thing going down the stairs, but there really was something special about having the T Rex looming over you on the couch. I got the idea from Learning Page where you can print out (on many sheets of paper) a life sized T Rex head. This was only 2 D, but lots of fun! I bet it could be done 3D (or at least bas relief) coming out of the wall if you stuffed paper behind it.

Another fun thing (again with the big roll of paper!) was to have the kids draw their favorite dinosaur tail on a double thickness of paper, color it and cut it out. Then you can staple the 2 sides together along the long sides (leave it open where the tail meets the body) and use the paper scraps to stuff the tail to get make it 3D and stiff enough to stick out properly. Finally, we used packing tape to tape the tail to the kid (running it around their middle and folding the last bit of tape so you have an easy way to get it off). The kids (I had a friend's family over) all went nuts!!

Tuesday, July 24, 2007

Stalking the Giant Squid

Kate, this one's for you and your princess!

The truth is, catching an entire giant squid on film is extremely difficult. A giant squid in your house presents different challenges than one in the wild. In this case, since he was taking up 4 rooms, I couldn't get him all in one shot. Here is his tail.


And his mantle.

And here is the rest of him, except, of course, it's not.
There are 8 20' orange streamers which are his arms and 2 40' red streamers which are his tentacles. You can just barely see his eyes and the siphon is invisible.

The black cords are actually Christmas lights hung over the baby's cradle (adds interest!) and you might be able to make out the other stuff on the ceiling (body traces of my kids dressed as super heroes swimming with the squid). The arms and tentacles curve off to the left into the dining room and then on into kitchen. The squid can reach all the way around my house to scratch his tail!

Click on the last picture for a larger view.